Follow me on Twitter!

Sunday, October 31, 2010

Happy Halloween Post for a prize!


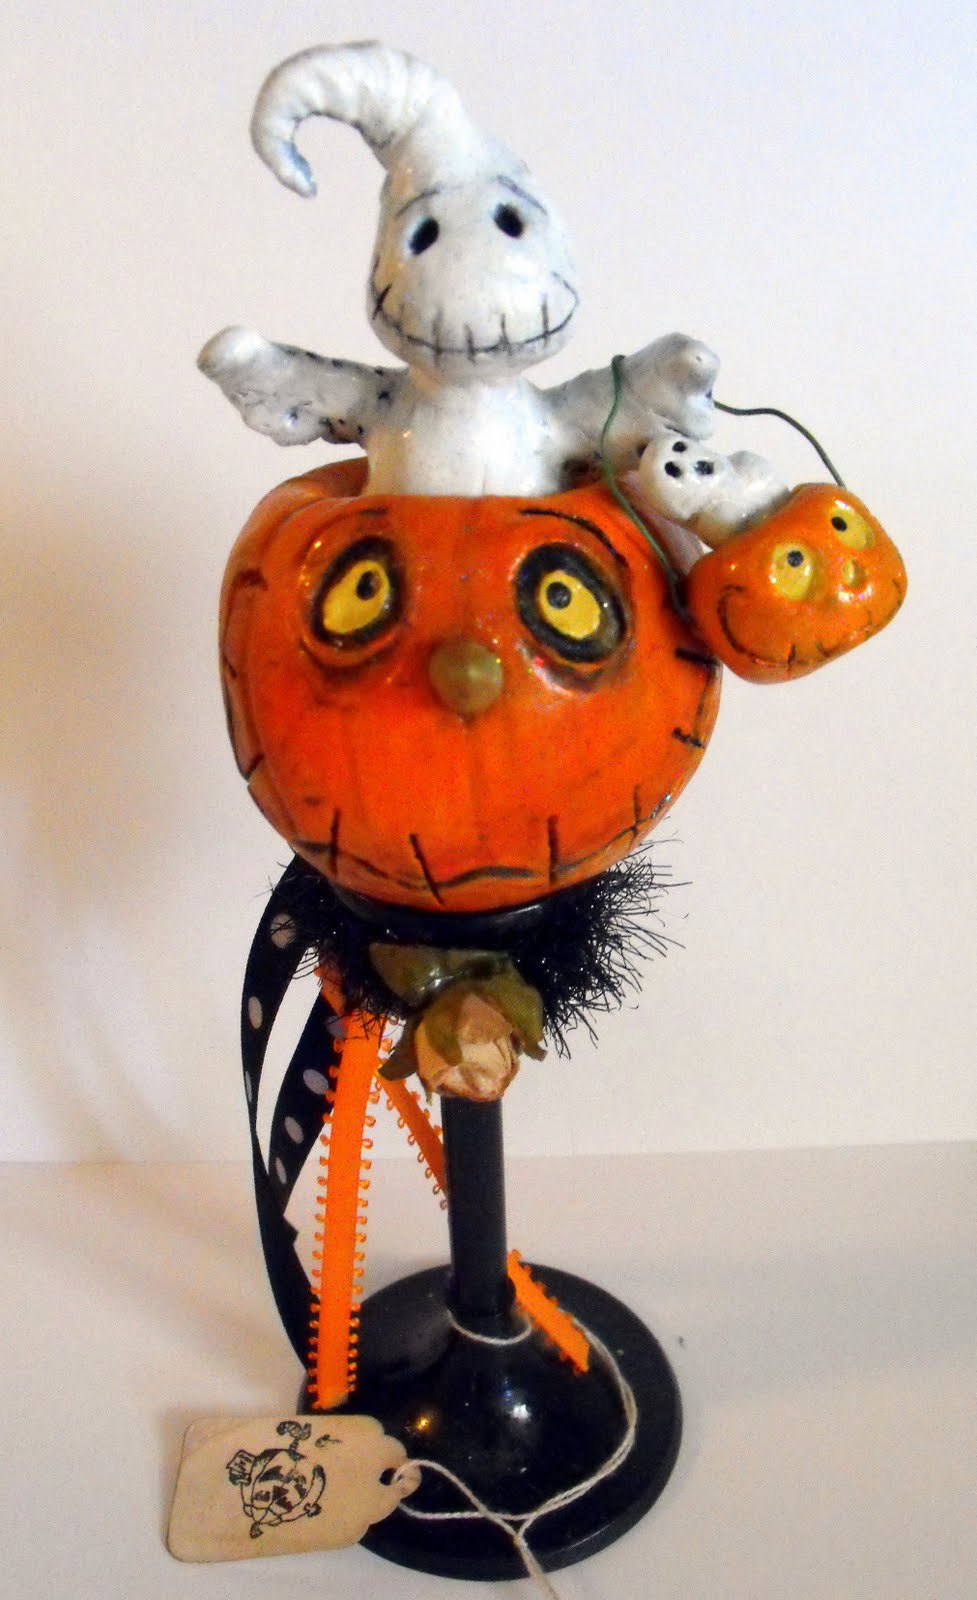
First off...HAPPY HALLOWEEN! I hope everyone is having a fun safe Spooked out day! Now on to the surprise. The 20th person to post a hello at my blog will win a print of the photo above! So lets see who reads this today!
also don't forget that you can win 3 Grimmy's at my Ebay auction. It ends in 5 hours!!
Hugs and boos from me and the gang!

Thursday, October 28, 2010

Halloween Sale!!!


Today through Halloween I am having a big sale! 25% off all fixed price Folk art! There are prints, original paintings, clay and lots of other Halloween and Christmas goodies! Go take a looksie!


I hope everyone is having a great day! I'm still glued to the AMC fright fest! It's going to be over soon..sniff sniff!

Hugs and Boo's

Carmen and Grimmy Ellis

Wednesday, October 27, 2010

Psssst....Fat head snowman inside!


I finally got this cutie finished so I listed him on Ebay as an auction! His head is sewn and painted and he sits on a really cool Victorian reproduction block. It's big! This is not a little guy. He is 13 inches high and 6 inches across! His party hat is made of paper and he shimmers with fine glitter in the light. Before I attached his head to the block my son and I played catch with it! It tosses great! hehe...

No don't worry his head is attached to the block and it won't fall off. Not unless you pretend you are Lizzy Borden this Halloween and you hack it off! If you do that then you are just weird!! BAHAHAHAHHA!

Can you tell I haven't had much sleep this week???? My eye baggies have baggies!

So anyway! Go bid on this one of a kind snowman make do doll thingy! He's cute! Oh and there is a lot of detail on the face with beautiful pink and blue shading! I LOVE PINK!


I don't sew very often so this might be the only snowman doll I will make this year!


Don't forget that there is one more auction in my Ebay shop where you can win 3 grimmies! The pregnant one seems to be the fave! You can find that auction by click my store link when you go to peek at this one! Here is the link


CLICK HERE FOR SNOWMAN DOLL


Ok I really have to go because Pet Cemetery is on AMC!


Hugs from Carmen and Grimmy Ellis


Spookyhollow.net

Monday, October 25, 2010

Why won't my dog go into the basement????


Spooked out alert! Today since the weather is so nice I decided it would be a good day to tackle cleaning the basement. If you are like me the basement is the very last room to be cleaned. Especially since my basement is right out of the movie a Haunting in Connecticut! No kidding a friend sent me the movie just to show me how much it looked like the basement in this famous haunted house! It even has those really large sinks in one room. This is a farm so maybe they were for something farm related but I have no idea what this house was used for about 50 years ago. The last owners were here for about 50 years. The house was moved from the city to the country and the basement belonged to a house that burned down....all I know..

I went down with mop, cleaner and bucket and of course turned the little basement TV on. ( Yes there is a TV in the basement hehe ) After burning my eyes out with bleach vapors I realized that my dog Scooby wasn't by my side. She is always at least 3 feet away from me or closer because she needs dog prosaic. I looked around and heard her crying. I went to the stairs and there she was looking down at me crying with the hair up on her back. She never does that! If you scroll down on the blog somewhere you will find my true ghost story about this house. About a month ago the spooky events in my home got so bad I had 2 ghost hunter friends help me out and tell me what to do. I did everything they asked and ever since no unexplainable events thank God. But today when I came downstairs this morning my kitchen cabinets were open again. They haven't done that in over a month. Then my dog who follows me everywhere was crying and freaked out at the top of the stairs. Needless to day I finished cleaning in lightning speed.

When we first moved in the dogs would not go into the basement period. Not even if we offered them a treat. Later after I ran around the house with a smudge stick yelling get out lol....they had no problem going into the basement. If this ghost thing is coming back I am MAKING my ghost hunter pal come help me.

Hopefully my dog didn't like the smell of bleach lol.

I will fill you in on the final spooky straw that made me run to my ghost hunter friends. You can choose to believe it or choose to think I'm nuts. I'm ok with either one lol.

At the time this last event happened I had very scary things happening that I have already blogged about but a fast description is...knocks on my bedroom door and coming from inside the closet, My hair pulled, a scratch on my closet door and then it opened. ( that one made me run downstairs faster then the roadrunner...BEEP BEEP..
Cabinets opening randomly, bangs from the basement, a mans voice coming from one of the down stairs bathrooms...
But the night I couldn't take anymore I was sound asleep in my bed. I woke up to scratching right by my head. It sounded like 2 cats scratching on a scratching post. The only problem was there was not a cat in the room. I even saw my dog sniffing at the corner of the bed the scratching was coming from. I ran downstairs and slept on the couch after I calmed down. There was NO explanation for the scratching. NONE....no animals. We even checked the bedroom closet out for places where a larger animal could get through. Not a single hole. If you look at my mattress 3 corners are fine and the corner that was by my head and had the scratching noise is all tore up! THIS IS TRUE!!!!!!!

The next day my friends told me what to do to get rid of it and so far it has been bliss. Today didn't feel that blissful but then again since everything that happened I am really jumpy. I jump when the toast pops up! LOL

So...wish me luck that my dog didn't sense something in the basement! I am probably being paraniod due to the bleach fumes and dust mites that flew up my nose!

HOLD ME! LOL

Carmen and Grimmy Ellis...over and out!

Sunday, October 24, 2010

Holiday buckets & Zach Bagins flexes his muscles!


stupid blog jabber after the photos!


Pregnant Grimmy??


As promised here are the finished pumpkins and Snowmen! It is kind of funny how I got all these done today. This morning I looked at my clock and it said 6 am. So I decided to get up before everyone else did so I had some alone time with my coffee cup. I walked downstairs, made my coffee and turned on Fright Fest on AMC. I then turned on my pc to check my email. I looked at the computer clock and gasped. 4 am! I got up at 4 am! NOOOOOO! When I checked my bedroom clock the time was correct so basically I need to wear my glasses to bed lol. I could have had 2 more precious hours of sleep! Now my day is all out of whack because I am a creature of habit plus I'm tired! Last night I stayed up late watching the ghost adventure team yell at ghosts and call them stupid! ( not sure if that method of ghost hunting is smart! ) I would be like...hey ghosts...please don't hurt me! One day soon i will catch folks up on my ghost story. What I will say now is I was on the fence about ghosts until this year. I am a total no doubt believer. Anywho I got off the subject. AGAIN! I have the attention span of a flea.


Ok...My little buckets are finished. 3 snowmen and 2 pumpkins. I also made a very different looking Grimmy just because. It started out as a ghost and I messed up so this is a weird tall Grimmy with a very fat stomach. Either that or he is going to have a baby Grimmy. Hey I don't know how 3 inch grim reapers reproduce!

Again I am off track!!

My pumpkins are about 4 inches high and 3 inches wide and will be in my Ebay and Etsy shops. I am going to get some listed right after this blog.

So watch my shops or the best way to find out new listings is following me on facebook because I am a facebook addict!

Follow me on facebook...

My ebay shop link is..

my Etsy shop is..


If you want to send me presents...

CLICK HERE! ( hehe )


Ok I really have to go because Zack from Ghost adventures just flexed his muscles!

Have a great night

Carmen and Grimmy Ellis

Saturday, October 23, 2010

Make a poor man Paper clay pumpkin pail!


Seriously weird Paper clay Pumpkin pail instructions!


When I first started to make clay creations I really couldn’t find many how to articles or videos. I thought some of the things I have learned by trial and error would make a cool blog post. Trust me I have destroyed many a clay doll or sculpt in my time!

So here are some paper clay tips that I have learned. I am totally self taught so some tips might sound ridiculous! Folk artist does mean a self taught artist! Nothing wrong with being self taught! Many a famous RICH artist were self taught!


Ok….

1. The best clay I think you should start out with is of course ….paper clay brand name Creative. It costs about 9 - 11 dollars for a 16 oz package. You can buy this at Michael’s, Hobby lobby and other craft stores or you can purchase it via eBay.

2. One thing I didn’t realize for like 6 months is that you can bake it in the oven at 200 or even on warm..DERR! I can be stupid like that. If you use the warm setting you can gently dry it with little or no cracks but I am getting ahead of myself here.

3. Tools. Omgosh I can’t stress enough that you don’t have to buy expensive tools if you can’t really afford it. I should know because I think I am one of the thriftiest Folk artists around due to being poor lol!
I use paint brushes for gentle shaping, a wood carving tool because I just happened to have one laying around the house, q-tips & finger nail files, A sharp pokey thing that puts the holes in hand made beads. ..( My terms are so professional huh?!) I also use old vintage dip pens for fine detail, …anything just randomly within reach because I am lazy like that!
Heck I raid our barn for tools!

( Quick tip…keep coffee way out of reach or you WILL dip your brushes in it. Or am I the only one nuts enough to make this dreaded error! ) Death by coffee clay is not pretty.

If you are half blind like me you might want to put your glasses on. ( My glasses are pitiful due to the dog eating them one night. ) I also need 3 bright lights to see what I am doing… ANYWAY….

This how to can also be used to make a snowman pail.

Materials needed:

Paper clay, DUH
Wax paper,
Small bowl of water, or a cup…Just don’t place the water in your hands…it spills like that..hehe
Glitter ..optional

Paint brush flat and fine tip
Wire & wire cutters
Paper towel, ( I get super messy. Probably because of my half eaten glasses. )
Exacto tool or a sharp kitchen knife
…( Don’t run with pointy objects )
Or whatever you can find around the house to sculpt with. Please don’t use your cat.
Reynolds wrap
Styrofoam ball medium size. Not dinky not huge ( makes about a 4 inch pail )
Something to roll out the clay with. Rolling pin or even a marker.
There are more expensive tools but this is my cheap way! I use the marker because again, I am lazy like that!

Step one: Remember I am giving you the easiest way I know. This is how I used to make pails or little trick or treat buckets when I first started experimenting.
( Do not use a real pumpkin…your buyers will get really mad! ) J~

Take the Styrofoam ball and cut off the top just like you would with a real pumpkin.

Scoop out the guts. I use a wood carving tool but you can also just scrape the insides with a knife and break the pieces out. Try to make the ball thin but not too thin that you might make a hole.

Set the scooped out ball aside. You will be wearing some Styrofoam bits. This is normal..hehe

Take a glob of paper clay.. ( again So technical terms! ) heh
Roll it pretty flat but not paper thin on the wax paper. Less stick age that way!

Place your ball on the clay in the center.

Score the clay…( take a knife and make little cuts in a circle around the ball so the clay is easier to apply.

At this point don’t wet the clay! Just use your fingers to squish the clay on all around the ball blending it together for a smooth surface. Make sure you have enough to squish in the inside. Now roll the ball between your hands smoothing the clay all the way around. Make sure you have enough clay at the top of the ball so you can squish it inside the pail.. Sort of like a pie crust! Stick your finger inside the ball and smooth the clay around the inside. You might have to cut a few strips of clay to fill the inside of the ball completely. Just smooth it all around with your finger. ( you don’t need this perfectly smooth…if you look at most folk art you will see bumps left there to get a vintage clay look.

Now that you have all the clay on the ball inside and out ( hopefully a kind of thin layer ) push your pail down to form a flat bottom. You want your pail to sit well.

If you like use a flat small paint brush, dip it in water and smooth out your pumpkin! Play with it a bit…with a little bit of water you can make a beautiful smooth surface!

Ok here is the fun part! Use the end of a pencil or the handle of you exacto knife and push it into the top part of the pail for eyes! Or make triangles for a spookier look!

Take a small piece of wire and stick it into the pail where you want your nose to be. Take a little ball of clay and work with it until you have a little carrot nose.
Stick the nose to the wire. If you like you can use a wet paint brush and go around the nose so it sticks better. You can also gently shape the nose this way.

The mouth..
Same thing as the eyes! Find anything laying around that you can press into the clay for small circles. I use the end of my beading tool but you can use anything you can think of to make the desired size holes for your mouth. I like to make 7 dots so the middle one is centered.
I have even used a crochet hook before!


Or carve the spooky mouth like the photo!

Don’t forget to poke a hole on either side of the pumpkin for the wire handle!


Now really look your pumpkin over. Is is shaped like a pumpkin? Do you want to add detail like lines or eyebrows….anything your imagination can think of!
Is the inside smoothed with clay so the Styrofoam doesn’t show?
( One trick I use to get the Styrofoam smooth before adding clay is using a heat gun. ( embossing gun you can buy at Wal-Mart Martha Stewart brand .)


You are ready to bake!
Place your art on a cookie sheet. ( Yes your pumpkin is art! You created it with love and detail. This is art! ) Don’t let anyone tell you different. Crafting and art in my mind are just about one in the same! Ok , now If you did the bottom right on your pumpkin it won’t flop over.
I have killed many art pieces by letting them plop or forgetting about them in the oven because the dog barfed or something.

Turn your oven to 200 if you would like the pumpkin to dry quicker. You can risk cracks if you do it at this temp and forget to take it out of the oven like I do!. Also if you leave it in over an hour you Styrofoam might melt!

So lets say you used warm for about 4 hours. Take out your pumpkin pail and let cool. Make sure it is completely dry or you can risk cracking or even mold!

Once it is cool PAINT!!!
You can use acrylics and just have fun with it!!

After the paint is dry you can choose between a glossy or matte finish. I do both. I think they are equally pretty but many people prefer a matte finish for clay art.

Let dry!

( Oh some people paint the pumpkin with acrylic gesso first. I don’t because I think the color is prettier with out the gesso. )

You can go wild on your pumpkin! Use acrylics, watercolors or oil! It’s your call.

Now you need the wire for the handle. I have a wire curler but you don’t need that!
Wrap the wire around a pencil then gently pull is so it will fit your pumpkin.
Place the ends in the holes you made and fold the wire in the inside down.

There you have it! A sweet little Halloween pumpkin pail! ( or it could be a snowman pail! )

You can also add tinsel, tinsel pipe cleaners, crepe paper collars, glitter…again have fun.!

Some important rules.
DON’T COPY ANYONE ELSES ART!

Why?
The artist will hate you! Lol
You could get a bad reputation in the folk art world.
But mainly you need your own style to stand out from the rest!


This was my first how to and I hope I explained it right but it you need help just email me at folkartist@spookyhollow.net

Now go get messy and have fun. I would love to see photos of you finished pumpkins!

Carmen and Grimmy Ellis
www.spookyhollow.net

Thursday, October 14, 2010

The winner is...!


As promised here is the winner of the Spooky Hollow Coffee table book! The book is filled with 50 full color pages of some of my favorite pieces! There are lots of Grimmy photos included! This prize is a Hard cover edition and signed. Drum roll please!..........

Congrats goes to Tamara Dozier!!! Please email me at
folkartist@spookyhollow.net with your home address so I can mail you your book!

If anyone would like to buy a hard cover or soft cover Spooky Hollow book please email me at the same address so I can sell you a signed Book!

One more thing before I go. I just listed Hootie owl, A really cool ghost pumpkin candle stick and a little mouse ornament in my Ebay store! click the link below to go peek!

MY EBAY SHOP CLICK HERE..LOL

Here are some photos of the goodies I listed today!


Have a bootiful day and more scares from me and Grimmy this weekend!

Carmen And Grimmy Ellis
SpookyHollow.net